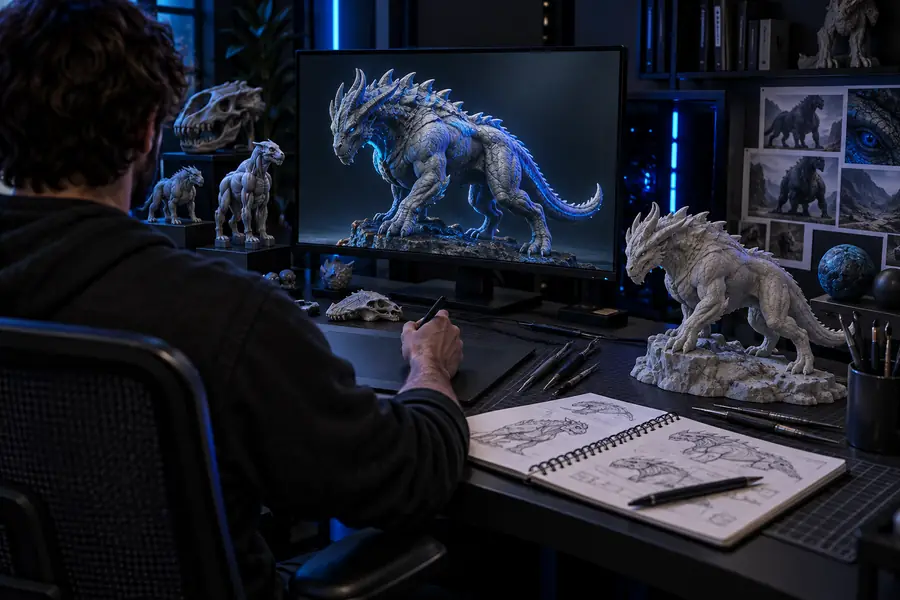
Blender workflow

Bring hitem3d blender models into your 3D workflow

A hitem3d blender workflow keeps ideation quick without replacing the tools you already know. Generate a starting mesh, move it into Blender, then use familiar modeling, sculpting, shading, rigging, and rendering steps to finish the asset.

A Hitem3d model prepared for a Blender workflow

Choose your handoff

the audience's existing pipeline

Hitem3d is most useful when it meets artists inside an established process rather than asking them to rebuild their entire toolchain.

Concept artists

From rough idea to editable starting point

Concept artists can use Hitem3d to turn a creature, prop, or environment description into a tangible form before committing to detailed modeling. The generated object becomes a proportion reference or a blockout that can be reshaped in Blender.

  • Start with silhouette and major proportions
  • Replace uncertain areas during cleanup
  • Use the mesh to guide camera and composition

Blender modelers

A faster first pass before refinement

Blender modelers can treat Hitem3d output as upstream geometry. Import the asset, inspect its scale and topology, then decide whether to retopologize, sculpt over it, separate parts, or use it only as a visual guide.

  • Check normals, scale, and object separation
  • Create production topology where needed
  • Keep the generated mesh as a reference layer

Small studios

A practical bridge between departments

Small teams can use Hitem3d for early asset exploration while Blender remains the place for shot preparation and final control. This makes it easier to test several directions before spending time on polish.

  • Explore alternate props and characters
  • Agree on a direction before detailed work
  • Centralize materials, cameras, and scene files in Blender

Fit the handoff

where we slot in

The strongest Hitem3d use case is the space between an idea and a deliberate Blender asset: enough structure to evaluate, enough flexibility to keep authorship.

Character artist

Generate a recognizable figure from a concise description, then use Blender to correct anatomy, clothing layers, facial forms, and deformation zones.

The result is a faster blockout for sculpting and rigging. For a broader overview of the generator itself, see hitem3d ai-powered 3d model generator.

hitem3d ai-powered 3d model generator

Product visualizer

Create an early furniture, device, or packaging form, bring it into Blender, and rebuild the surfaces that need precise dimensions or clean reflections.

Hitem3d supplies visual direction while Blender handles presentation detail. If the input begins with a reference image, compare the workflow with image to 3d model.

image to 3d model

Game asset artist

Use Hitem3d to explore a prop or enemy concept, then prepare a game-ready version with optimized topology, UVs, materials, and export settings.

The generated form shortens ideation, while Blender preserves control over every production constraint. See how to use hitem3d for a guided start-to-finish process.

how to use hitem3d

3D printing hobbyist

Turn a character or object idea into a visible model, inspect it in Blender, close obvious gaps, and prepare the geometry for a slicer or print check.

Hitem3d can provide a useful first shape for physical experimentation, with Blender serving as the inspection and repair stage. For more practical ideas, browse hitem3d examples free.

hitem3d examples free

Make the distinction

before/after

Hitem3d and Blender serve different points in the same creative chain. One helps form an initial direction; the other gives you detailed control over the asset and scene.

Before: Hitem3d output After: Blender refinement
Primary role Rapid concept generation and shape exploration Controlled modeling, scene building, and finishing
Artist input Text or visual direction that describes the desired object Direct edits to geometry, materials, modifiers, cameras, and lights
Geometry status A starting mesh that may need inspection and cleanup A deliberate asset shaped for its intended use
Topology approach Evaluate first; do not assume production-ready edge flow Retopologize or rebuild areas that need deformation or subdivision
Look development Useful for judging the broad form and silhouette Precise shaders, textures, lighting, compositing, and render control
Best moment to use it Early ideation, blockout, and direction testing Revision, optimization, animation preparation, and final delivery
Ownership of decisions The system proposes a form from the supplied direction The artist makes the final technical and creative decisions

Simple handoff

deliverable spec

A reliable Hitem3d-to-Blender handoff is less about pressing one button and more about checking the asset at each transition.

  1. 1

    Describe the asset

    Give Hitem3d a focused subject, useful proportions, visible materials, and any defining features. Start with one object or a clearly bounded subject so the first result is easy to judge.

  2. 2

    Inspect the import

    Bring the generated model into Blender and check scale, orientation, normals, disconnected parts, hidden surfaces, and areas where the shape needs reconstruction.

  3. 3

    Make it yours

    Refine the silhouette, build clean topology where required, assign materials, add supports or rigging, and organize the scene for its final use or export.

Start with a shape

Use Hitem3d to explore the first form, then continue in the environment where you already know how to solve the hard parts. The handoff is designed for iteration: generate, inspect, edit, and repeat until the model serves the shot, game, print, or presentation.

Move from AI concept to Blender control

  • Begin with a focused object description
  • Treat the first mesh as editable source material
  • Keep Blender as the final control point
Try the 3D workflow

Scenario FAQ

scenario FAQ

These answers address the practical questions artists ask when considering a Hitem3d workflow alongside Blender.

Yes, the practical workflow is to generate a model with Hitem3d and bring the resulting asset into Blender for inspection and refinement. Check the exported file type and Blender compatibility at the point of handoff, then correct scale, orientation, normals, and topology as needed.

A Blender workflow does not require a native plugin. Unless your current Hitem3d setup provides a dedicated connector, plan on using the normal export-and-import route and keep Blender as the place for cleanup, materials, animation, and rendering.

Start with scale, orientation, normals, object separation, and the overall silhouette. After those checks, decide whether the model needs retopology, sculpting, UV work, material reconstruction, or only minor presentation edits.

They should be treated as starting geometry rather than guaranteed animation-ready assets. For deformation, inspect joint areas and edge flow, then retopologize or rebuild the parts that must bend cleanly before rigging.

It can support early exploration of characters, props, and other forms before you optimize them in Blender. A game-ready result still needs deliberate topology, UVs, materials, scale, naming, and export checks for the target engine.

Start creating
Start creating